SPRINGBOARD

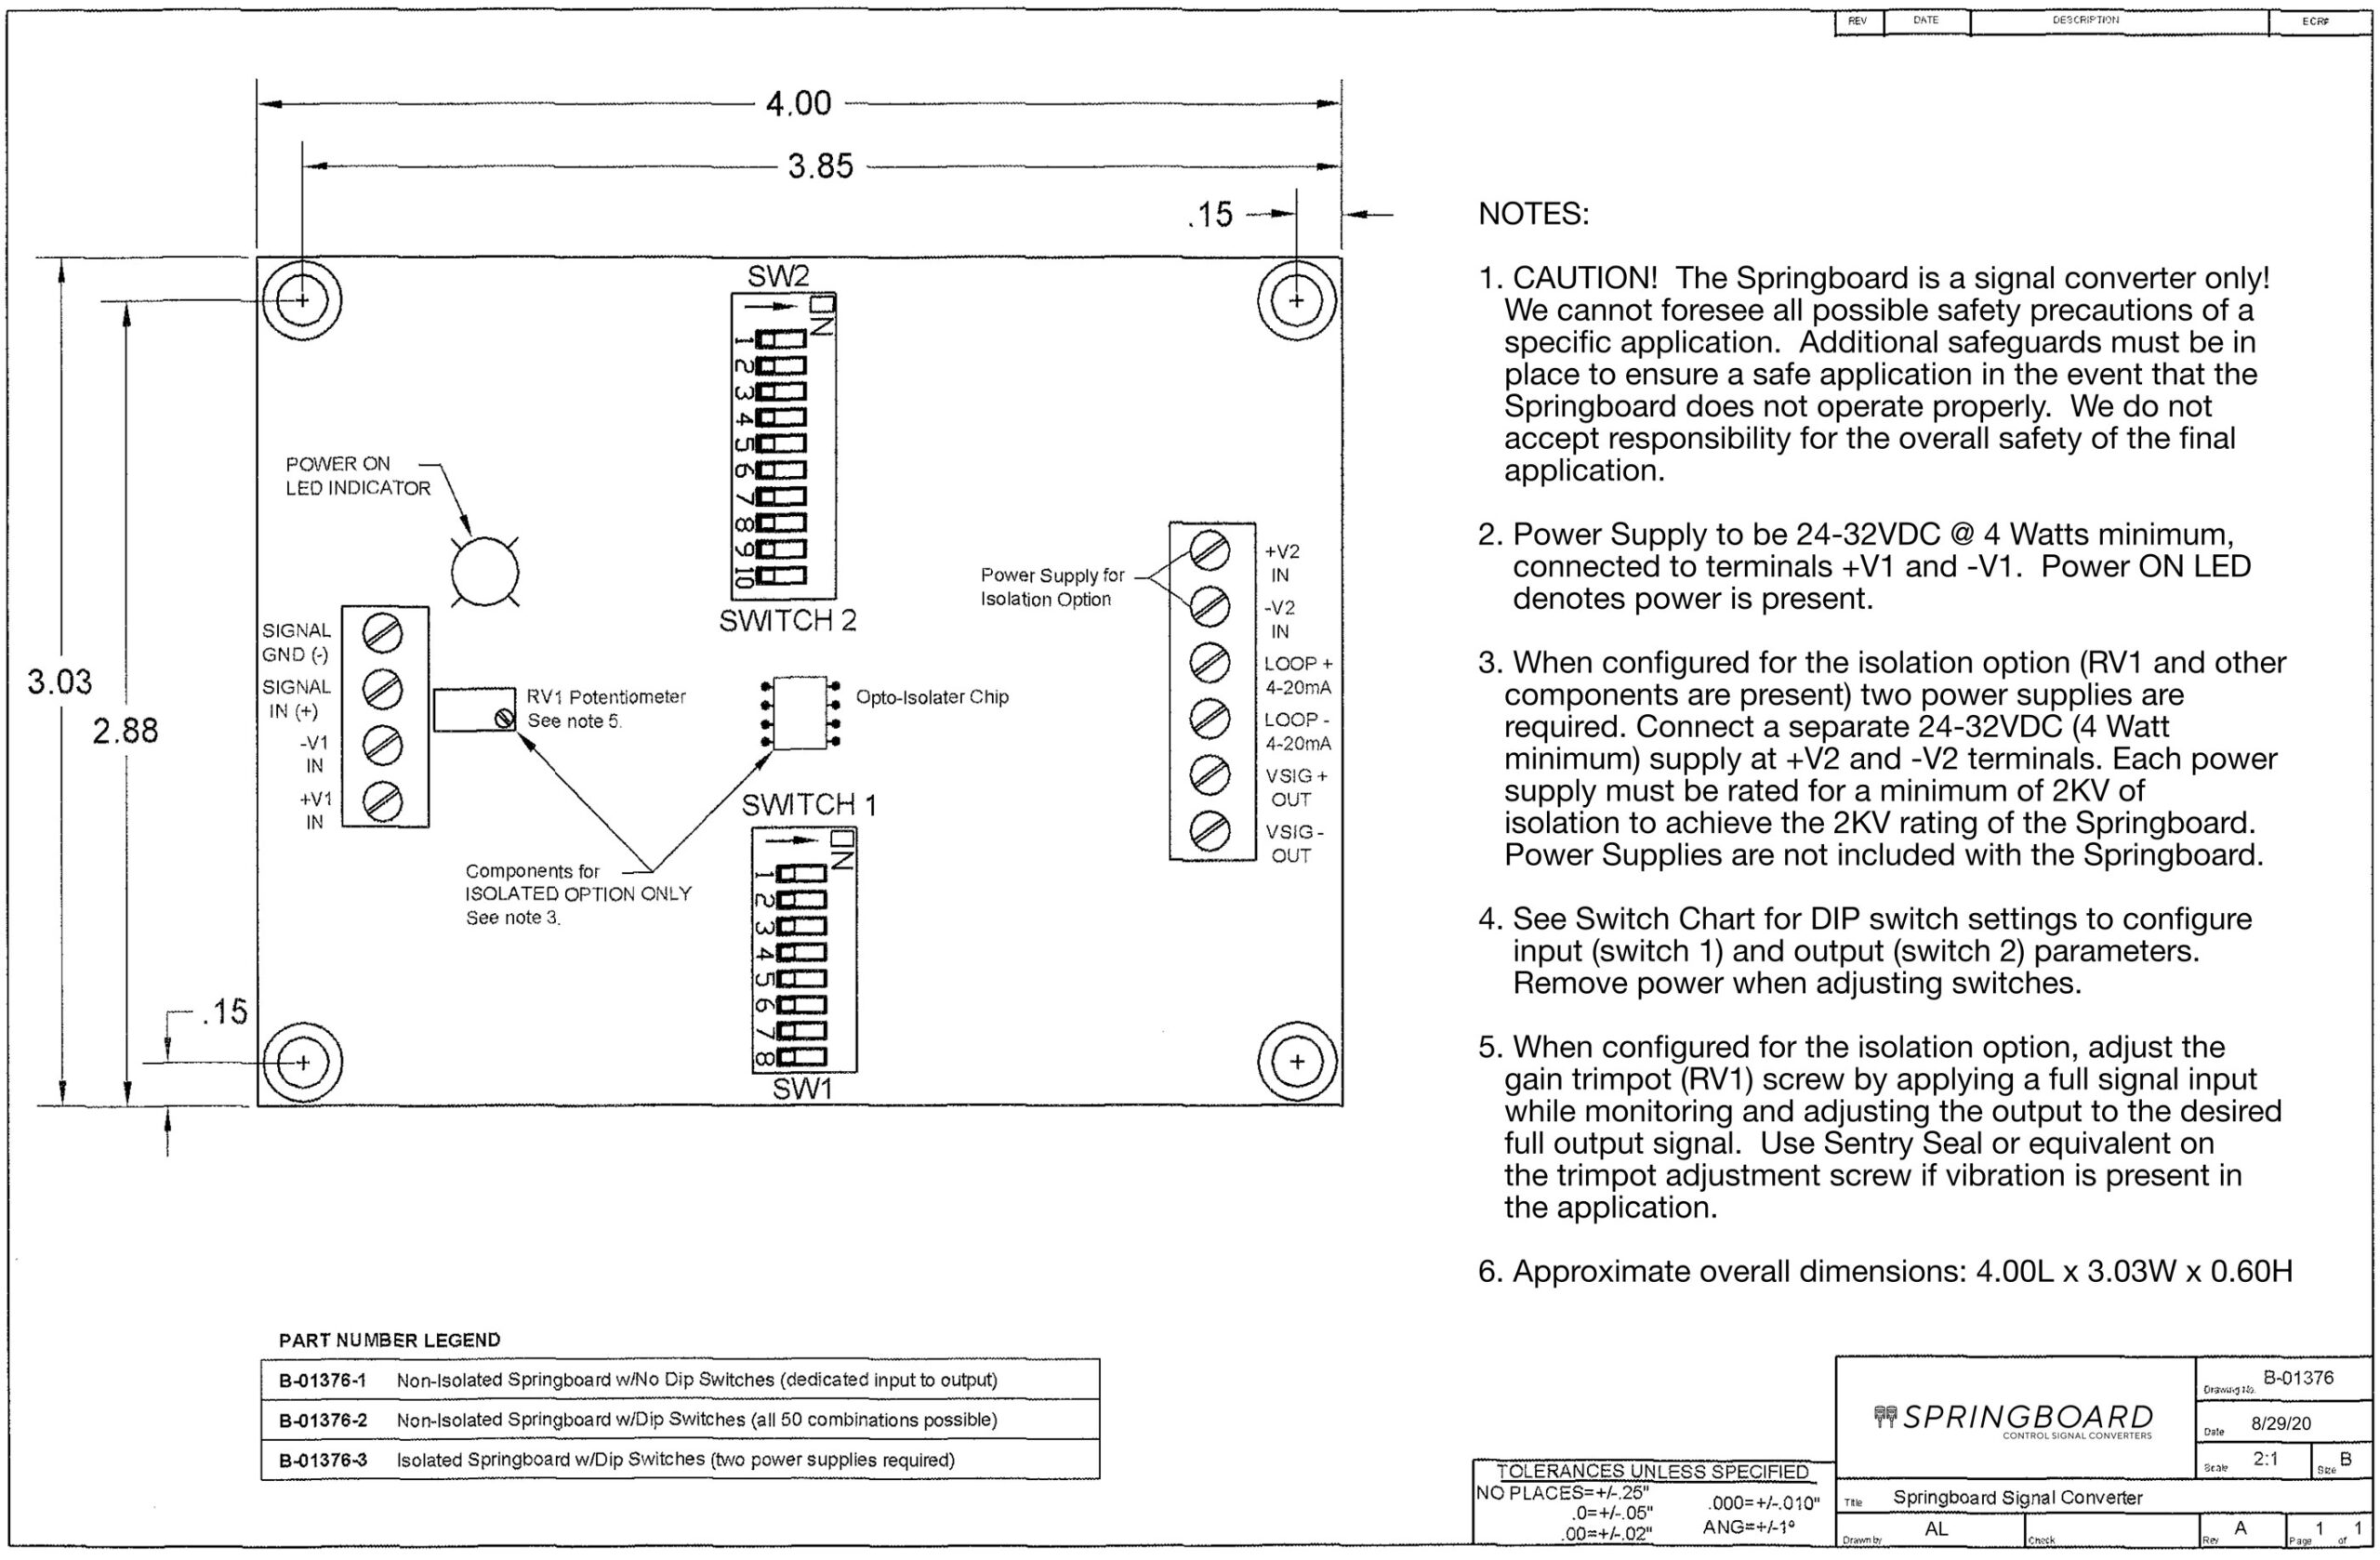
The SPRINGBOARD Control Signal Converter can convert one control signal range to another. The Springboard is capable of converting 50 different input/output configurations. The Springboard’s isolation option can electrically isolate a control unit from the device being controlled by up to 2000 Volts, and can be used to operate as a pass-through device (the output signal range is the same as the input signal range), providing electrical isolation only.
The Springboard Control Signal Converter will input and output signals with any of the following signal ranges:
0 to 1 Volt / 0 to 5 Volts / 0 to 10 Volts / -10 to +10 Volts / -5 to +5 Volts / 4 to 20mA / 0 to 20mA
Example: A 0 to 10 volt signal is selected as the input signal range by means of DIP Switch SW1. The output can then be configured using DIP switch SW2, for any of the above voltage or current ranges.
SPECS

Dimensions
4.00″ x 3.03″ x 0.55H”
Signal Parameters (Input-to-Output)
Accuracy +/-3%
Power Requirements
24–32 VDC @ 4 Watts minimum (dedicated supply)
Speed
Up to 100kHz in non-isolated mode
2kHz when in isolated mode.
Input Impedance
500k Ohms
Output Resistance
500 Ohms per Volt (with a source current of 0.002 Amps)
Output Current
0 to 20mA.
Input to Output Isolation
2kV optical isolation with option “-3” purchased
Signal and Power Connections
1 each 4 position screw terminal for signal and power inputs.
1 each 6 position screw terminal for signal and power outputs.
Voltage and Current Conversion Ranges
0 to 1VDC, 0 to 5VDC, -5 to +5VDC,
0 to 10VDC, -10 to +10VDC,
0 to 20mA, 4 to 20mA.
NOTE: One input and one output at a time can be selected. Any of these voltages and currents can be selected as either input or output, or both).
SWITCH SETTINGS

NOTE:
To prevent unexpected output voltages and currents, remove power from the Springboard before changing switch positions.


